After the Configuration and Installation of JobMail Connect, the add-in is available in Microsoft Outlook.
Click on JOBMAIL CONNECT in the upper menu bar. The following ribbon is opened:

JobMailConnect ribbon
If similar to the example above no configuration is displayed yet, please select a configuration from the picklist before archiving for the first time:

Selecting a configuration
Archiving a message via the ribbon
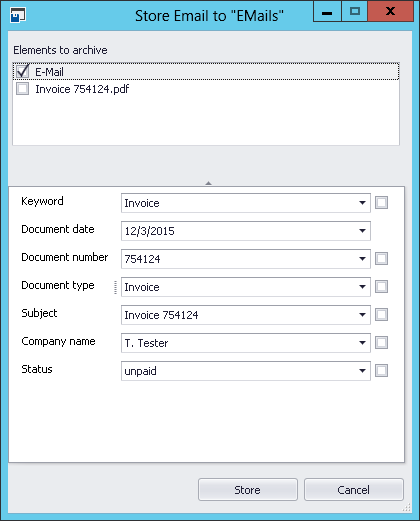
To archive a message, activate the respective email and click on the symbol ![]() . A dialog window (depending on the configuration in JobRouter) opens, asking you to enter or validate the index fields:
. A dialog window (depending on the configuration in JobRouter) opens, asking you to enter or validate the index fields:

Dialog with index fields
You can select elements of the message you want to archive at Elements to archive in the upper section (as long as Prohibit element selection is not activated in the configuration). The option Email is the email message itself, the other listed elements are the attachments.
The index fields visible in the lower section depend on the configuration. Every field is listed as picklist, clicking the field allows you to select already known values. Some fields may already be filled in.
For some fields, a checkbox is displayed on the right side. If it is activated, the values of the picklist will be filtered using the already set fields. Of course, you can write your own value into the field.
Required fields are bold and marked with an asterisk.
One click on Store stores the message in the JobRouter archive. Clicking Cancel cancels the archiving.
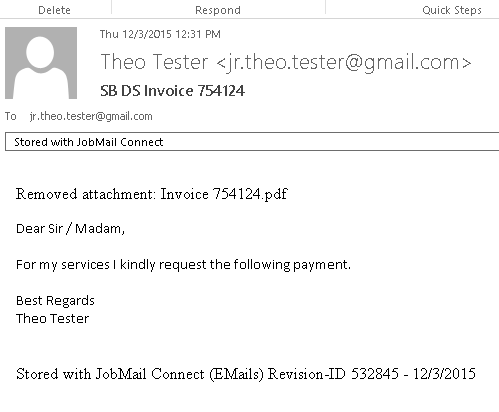
A notification will be displayed directly in Microsoft Outlook, informing you that the email is archived:

Message in Microsoft Outlook after being archived in JobRouter
At the end of the message, a note will be displayed telling you when and with which Outlook configuration an email was stored and the revision ID.
In the mail overview, the symbol ![]() is displayed at the respective emails as a note, informing you that it was already archived.
is displayed at the respective emails as a note, informing you that it was already archived.
Archiving a message via the context menu
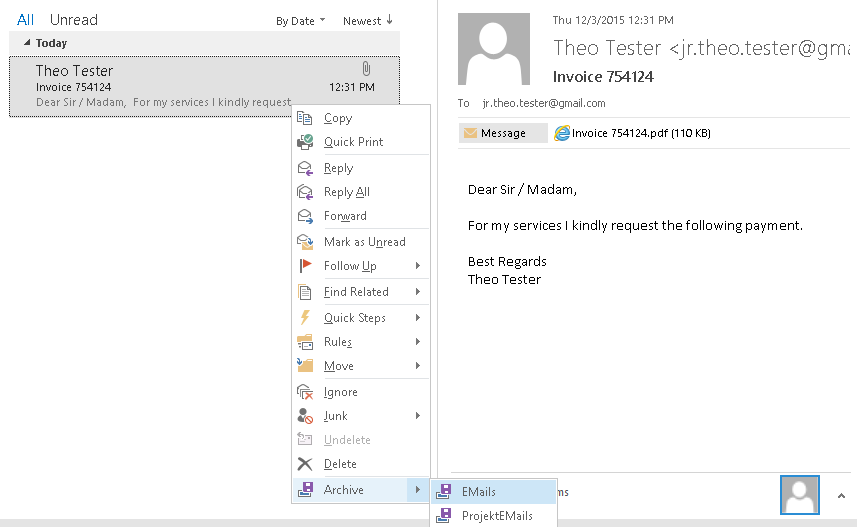
Alternatively, you can archive a message by right-clicking the respective email. A context menu opens, select Archive and then the respective archive:

Archiving via the context menu of Microsoft Outlook
As described in the previous section, a dialog window with the respective index fields opens.
Please note: If the configuration list was updated and the entries changed, the context menu will keep displaying the previous configuration for technical reasons. This can be corrected by restarting Microsoft Outlook.
Sending a message with subsequent archiving
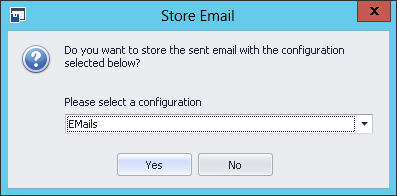
If the option Request to archive after sending was activated, a message will be archived after being sent. If two configurations are enabled for the user, a selection mask will be displayed that can be used to select the desired configuration:

After the selection, the email can be archived.
In the Cleanup settings of the configuration the deletion of attachments during archiving can be defined. To simplify the access to remote files, JobMail Connect offers the possibility to open attachments directly via Microsoft Outlook. To do so, click on the button Open attachments for messages with deleted attachments. The files are opened with the default program provided by the operation system.