A new database connection can be set up for your process via the Designer navigation menu under DB links by clicking on Database connections in the Resources section. You see an overview of all database links for the current process.

Database Links Overview
You will see the name of the connection in the Connection column, a description of the link under Description, the database type appears under Type, and if the checkbox is checked under Global, then it is a global link. You can use it for your process, but you cannot modify it there. Rather, perform modifications of global database links in the JobRouter Preferences (see the JobRouter Administration Manual).
Click New connection in the action bar to establish a new connection. Or if you want to modify an existing connection, click the appropriate name.
Please note: You cannot alter the connection name.
In either case, the following Edit Connection form window will be displayed.

Modify a Link
In the Details section, choose the desired database type in the drop-down list Type. Then assign a name to your connection in the Name field.
Please note: Once you have saved the link, you can no longer change the name.
Enter a description for your database connection in the Label field. The next section of the form window has fields that will vary depending on database type. You may configure the following parameters for the various database types.
MySQL / MariaDB
Connection to a MySQL respectively MariaDB Server.
Property |
Description |
|---|---|
Host |
Enter the server name or its IP address. |
Username |
Enter a username. |
Password |
Provide the password for that username. |
Database |
Give the name of the database used. |
Port |
Enter the port number, under which the server is available. |
Character encoding |
Choose the character encoding here in case the character set for the external database varies from the one used for the JobRouter database. |
Oracle
Connection to an Oracle Server.
Property |
Description |
|---|---|
Host |
Enter the server name or its IP address. |
Username |
Enter a username. |
Password |
Provide the password for that username. |
Database |
Give the name of the database used. |
Character encoding |
Choose the character encoding here in case the character set for the external database varies from the one used for the JobRouter database. |
ODBC
Connection to an ODBC-compliant data source.
Property |
Description |
|---|---|
ODBC Type |
Choose a database type from the drop-down menu. |
Name |
Enter a name to the ODBC interface. |
Username |
Enter a username. |
Password |
Provide the password for that username. |
Character encoding |
Choose the character encoding here in case the character set for the external database varies from the one used for the JobRouter database. |
SQLSRV
Connection to the Microsoft SQL Server via the SQLSRV extension (Unicode-capable).
Property |
Description |
|---|---|
Host |
Enter the server name or its IP address. |
Username |
Enter a username. |
Password |
Provide the password for that username. |
Database |
Give the name of the database used. |
Port |
Enter the port number, under which the server is available. |
Character encoding |
Choose the character encoding here in case the character set for the external database varies from the one used for the JobRouter database. |
When connecting to a Microsoft SQL server, you can set additional SQLSRV connection options.
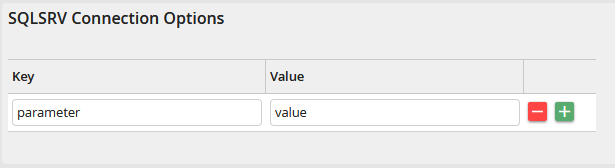
Please note: The parameters that can be set are listed in the SQLSRV documentation by Microsoft. However, some default parameters cannot be overwritten, in this case you will receive a notice in JobRouter accordingly.
Example: Azure SQL Managed Instance requires an encrypted connection. This can be configured with the Encrypt option and the value true.
Remote DB
Connection to a database via the Remote DB service (only in the cloud).
Property |
Description |
|---|---|
Connection |
Select the name of the desired connection |
Please note: If you try to connect to a database of a different database type than the JobRouter installation, the corresponding database client must also be installed. For more information on this, please refer to the Installation Guide from the Installing Database Clients chapter.
Testing and saving the database link
If all fields are filled, you can test your connection. Click on Test in the upper menu bar. The Test section of the input mask will display either a positive or a negative status message. If the test fails, an error message will appear there giving more detail.

Database Connection Error Message
Click Save to store your changes. You will be taken back to the database connection overview.