Use the layout elements to structure your form. When you create a form, an area with a section is automatically created.
In the Layout category, you will find the elements for structuring your form into individual areas, sections and columns.
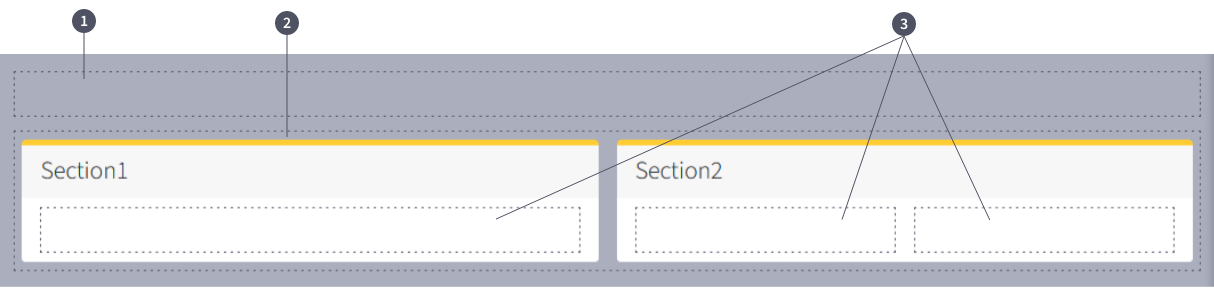
Function and display of the layout elements
(1) Area
An area divides your form into individual grids. An area can be the full width or 1/2 the width.
An area is indicated by a dashed line.
(2) Section
You can use sections to create further subdivisions within an area.
A section is represented by a white area with a yellow bar at the top and a name.
Sections initially take up the space provided by the area in which they are located. Furthermore, when a section is created, a column is automatically placed in the section. However, you have the option of displaying your section only half as wide.
(3) Column
If you would like to create a further structure within the sections, use the columns.
To do this, drag a column layout element into the desired section.
Handling the layout elements
Layout elements can easily be dragged and dropped from the toolbox into the workspace.
Configuration
Clicking on a layout element again in the workspace opens the Options tab in the toolbox.
Here you can enter or edit details and properties.
Please remember to confirm each desired change with the green Save button.v
Example: Placing several sections next to each other
If you want to place two sections next to each other, you have two options:
a) Create two areas with 1/2 width each and distribute the sections into the individual areas.
b) Create an area with the full width. Create a section with 1/2 width in this area. Drag a second section into the area above the first section (an orange line appears) and place your section. Now set your second section to 1/2 width. The sections are placed next to each other.